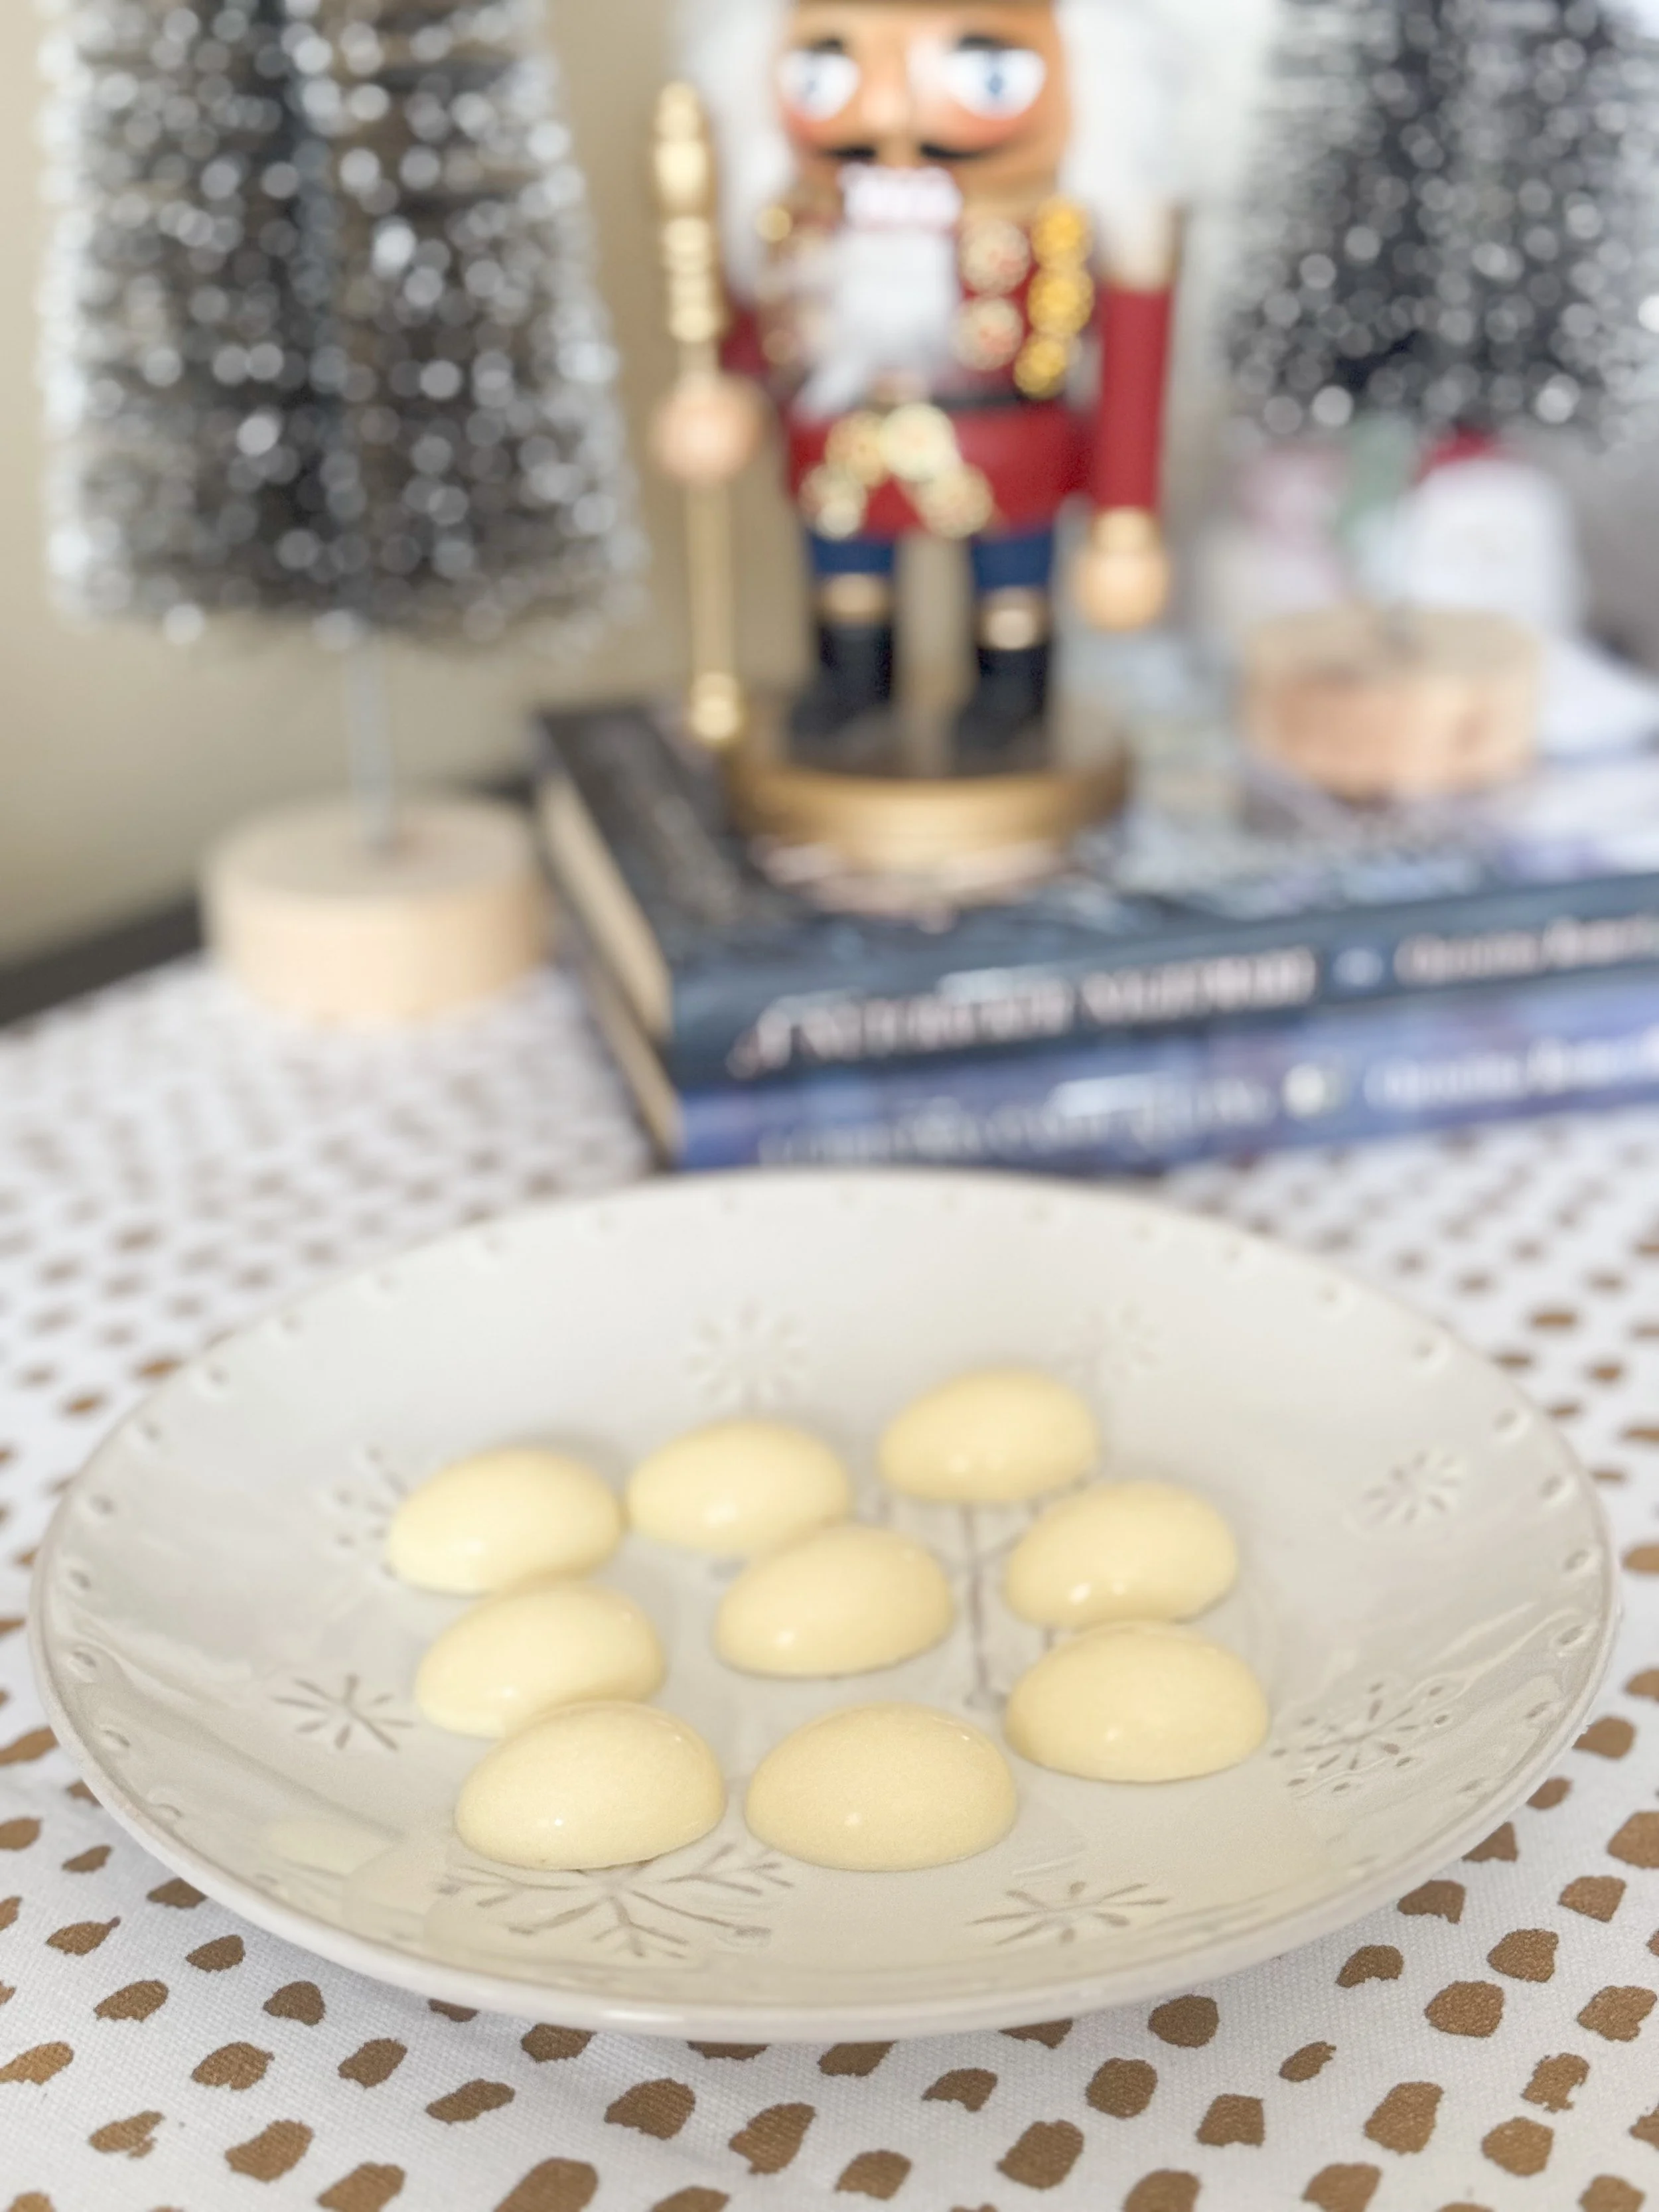
Nicotine Noel
These yummy chocolates are featured in Deck the Halls With Homicide, the third book in the Killer Chocolate Mystery series. This is a decadent white-chocolate ganache inside a white-chocolate shell. Poison-free (I promise).
White chocolate eggnog flavored ganache in a white chocolate shell. Makes approximately 20 bonbons.
250 grams white chocolate caletts (3 drop fluidity)
125 grams heavy cream
1 tbsp white corn syrup
30 grams unsalted butter, room temperature
¾ tsp eggnog flavor
-
Hand-Molded Chocolate Recipes
ToolsDigital kitchen scale (with metric)
Digital thermometer
Glass or plastic bowls
Bench scraper
Silicone spatulas
Disposable plastic piping bag
Polycarbonate plastic molds (mine are from Amazon)
Gloves
Wax paper
Gather all your tools. Your work surface should be clean and dry. Cover surface with wax paper. I like to weight out all my ingredients and have them in small bowls beforehand for the ganache.
Prepare Your Molds and Temper Your Chocolate:
Ensure your molds have been wiped clean with a paper towel or soft cloth and ensuring they are free of any residue. DO NOT touch the inside of your molds with your ungloved hands. You will leave fingerprints that will mar your finished chocolates. Also ensure your molds are completely dry. Seriously, water is your mortal enemy in the chocolate making process. Even a drop of water can ruin all your hard work.
Your house should be about 18 degrees celcius/64 degrees Fahrenheit if possible. If it is much warmer your chocolate will not set properly. (Found this out the hard way the first time. Had to move the chocolates all around the house and into fridge briefly on and off. Such a headache.) Ideally, you do not want to put your chocolates in the fridge as this can cause moisture issues. Remember water is not your friend. So put on a warm sweater and lower your thermostat, or turn up the air conditioning, depending on the season.
We will be using the microwave method of tempering chocolate. Pour about 300g of Bernard Callebaut chocolate calletts (or if using a slab, first chop what you need into small pieces) into a glass or plastic bowl. You can use other good quality chocolate, but this is not the place to skimp. Quality counts. For Poison Pear Ganache use dark chocolate with a 3 drop fluidity for the mold. For Candy Cane Coniine use white chocolate with a 3 drop fluidity for the mold.
Microwave for 30 seconds, take out and stir. Microwave for 20 seconds and stir. Repeat until most of your chocolates are melted, but not all. Don’t overheat, better to microwave in shorter bursts, this doesn’t take long. When most of the chocolate is melted, stir, stir, and stir some more (about 2 minutes.) Movement is essential in the tempering process, as is not melting all the chocolate in the bowl in the microwave. If you did accidentally do that, just add a few solid calletts to the mixture and stir until they are melted.
For white chocolate you need the tempered chocolate to be 29C/84F, for dark chocolate you need it to be about 31C/87.8F, before coating your molds. Use your thermometer to check the temperature. At the appropriate temperature a metal spatula coated with chocolate and placed on the counter should be solid in about 1 minute.
Heat your molds briefly with a heat gun – I used an embossing heat gun from my card-making days (a blow dryer will work in a pinch.) The molds should be about 2-4 degrees cooler than you chocolate.
Pour tempered chocolate into the mold. Keep your mold tilted at an angle over your bowl. Use your bench scraper and scrape off the excess from the top and sides of the mold back into the bowl. Tap the sides of the mold with the handle of your bench scraper. Then tap the mold on the counter. You want to ensure you get any air bubbles out.
Turn your mold upside down over the bowl so the excess chocolate can drip out. Tap the sides of the mold. Scrape again while the mold is upside down. Place the mold upside down on the wax paper for about 5 minutes. Then pick up one end, but still upside down, scrape again onto the wax paper. You want a nice clean edge on the chocolates. Place the mold upright on the counter or a cool place, 18 C/64F for 5-10 minutes.
Make your ganache. Recipes and instructions after the sealing instructions.
Sealing The Chocolates:
Once your chocolates have been filled and set you are ready to seal your chocolates. Have your tempered chocolate ready. Follow the same tempering instructions as above, but you won’t need quite as much chocolate. You can just add some new calletts to the leftover chocolate from filling the molds. But ensure you follow all the steps properly.
Briefly heat the filled shells with the heat gun. This will allow the sealing chocolate to stick to the shells. Apply your chocolate over the shells, not too much, but ensure each shell is completely covered. Scrape the mold.
Tap the mold on the counter and check for air bubbles. Add more chocolate and repeat if necessary. Store at 16 C/61F for at least 2 hours.
Ensure you have a completely clean work surface and cover with clean wax paper. You are going to flip your mold over quickly and give it a gentle crack onto the wax paper to unmold. If some shells stick, move your mold to a free spot on the wax paper and repeat, giving the mold a good crack on the counter. But not so hard you’ll break the mold. (And watch that stray fingers doesn’t get caught between the counter and the mold. Yes. Did that.) Use gloves to turn over the chocolates and put them in containers. I use cookie tins.
Store them at cool room temperature, away from humidity and light, for up to 3-4 weeks for Nicotine Noels.
Check out the tutorials at BernardCallebaut.com to see how the experts make hand-molded chocolates.
Cleaning your molds: Don’t use soap and water. Ideally, you will only wash your molds once or twice a year with hot water. Wipe the inside of the shells dry so there is no residue from the water. Normally, you can heat briefly in the microwave and wipe clean with a paper towel or a soft cloth. Remember no ungloved fingers inside the mold. Ensure molds are clean and dry before using again.
Using the ingredients from above for Nicotine Noel:
Place the pieces of white chocolate in a glass bowl. Ensure you use the right type of chocolate, as discussed in tempering chocolate.
Heat the cream and corn syrup in a small saucepan over low/medium heat until very hot, but not boiling. Pour the cream mixture over the chocolates and use a spatula to push down the chocolate so it is covered by the cream mixture. Wait a minute or two and then start mixing from the center of the bowl. Small circles at first and slowly moving outwards.
Keep the temperature of the ganache around 34-40C/93-104F while mixing so the chocolate will all melt. (I don’t check the temperature. As long as everything is melting it should be good.) You can use a heat gun or put mixture in microwave, very briefly, to warm mixture up, if needed. Work quickly. The mixture should have a pudding-like consistency, and should be glossy and smooth.
When the ganache reaches 35C/95F, add the butter, and eggnog flavor. Mix gently to incorporate. Ensure the butter is completely melted. Heat with the gun or microwave carefully, if needed.
Once the ganache is 28C/82F pour it into a disposable piping bag. Cut a very small opening at the tip. Don’t press hard, you want the ganache to come out slowly. Carefully fill each shell and ensure you leave 1.5mm/1/16 inch space from the top of the mold. Ensure that space is across the entire chocolate. (I over filled some of mine in the center and couldn’t get as much chocolate over them as I would have like for a really good seal.) Don’t spill or smudge the filling onto the chocolate edges of the shells. This can cause problems with sealing them.
Tap the mold on the counter to get out air bubbles. Get down and look across the mold at eye level to see if you over filled any shells. Cool at 17C/61F for at least 2 hours.
text goes here
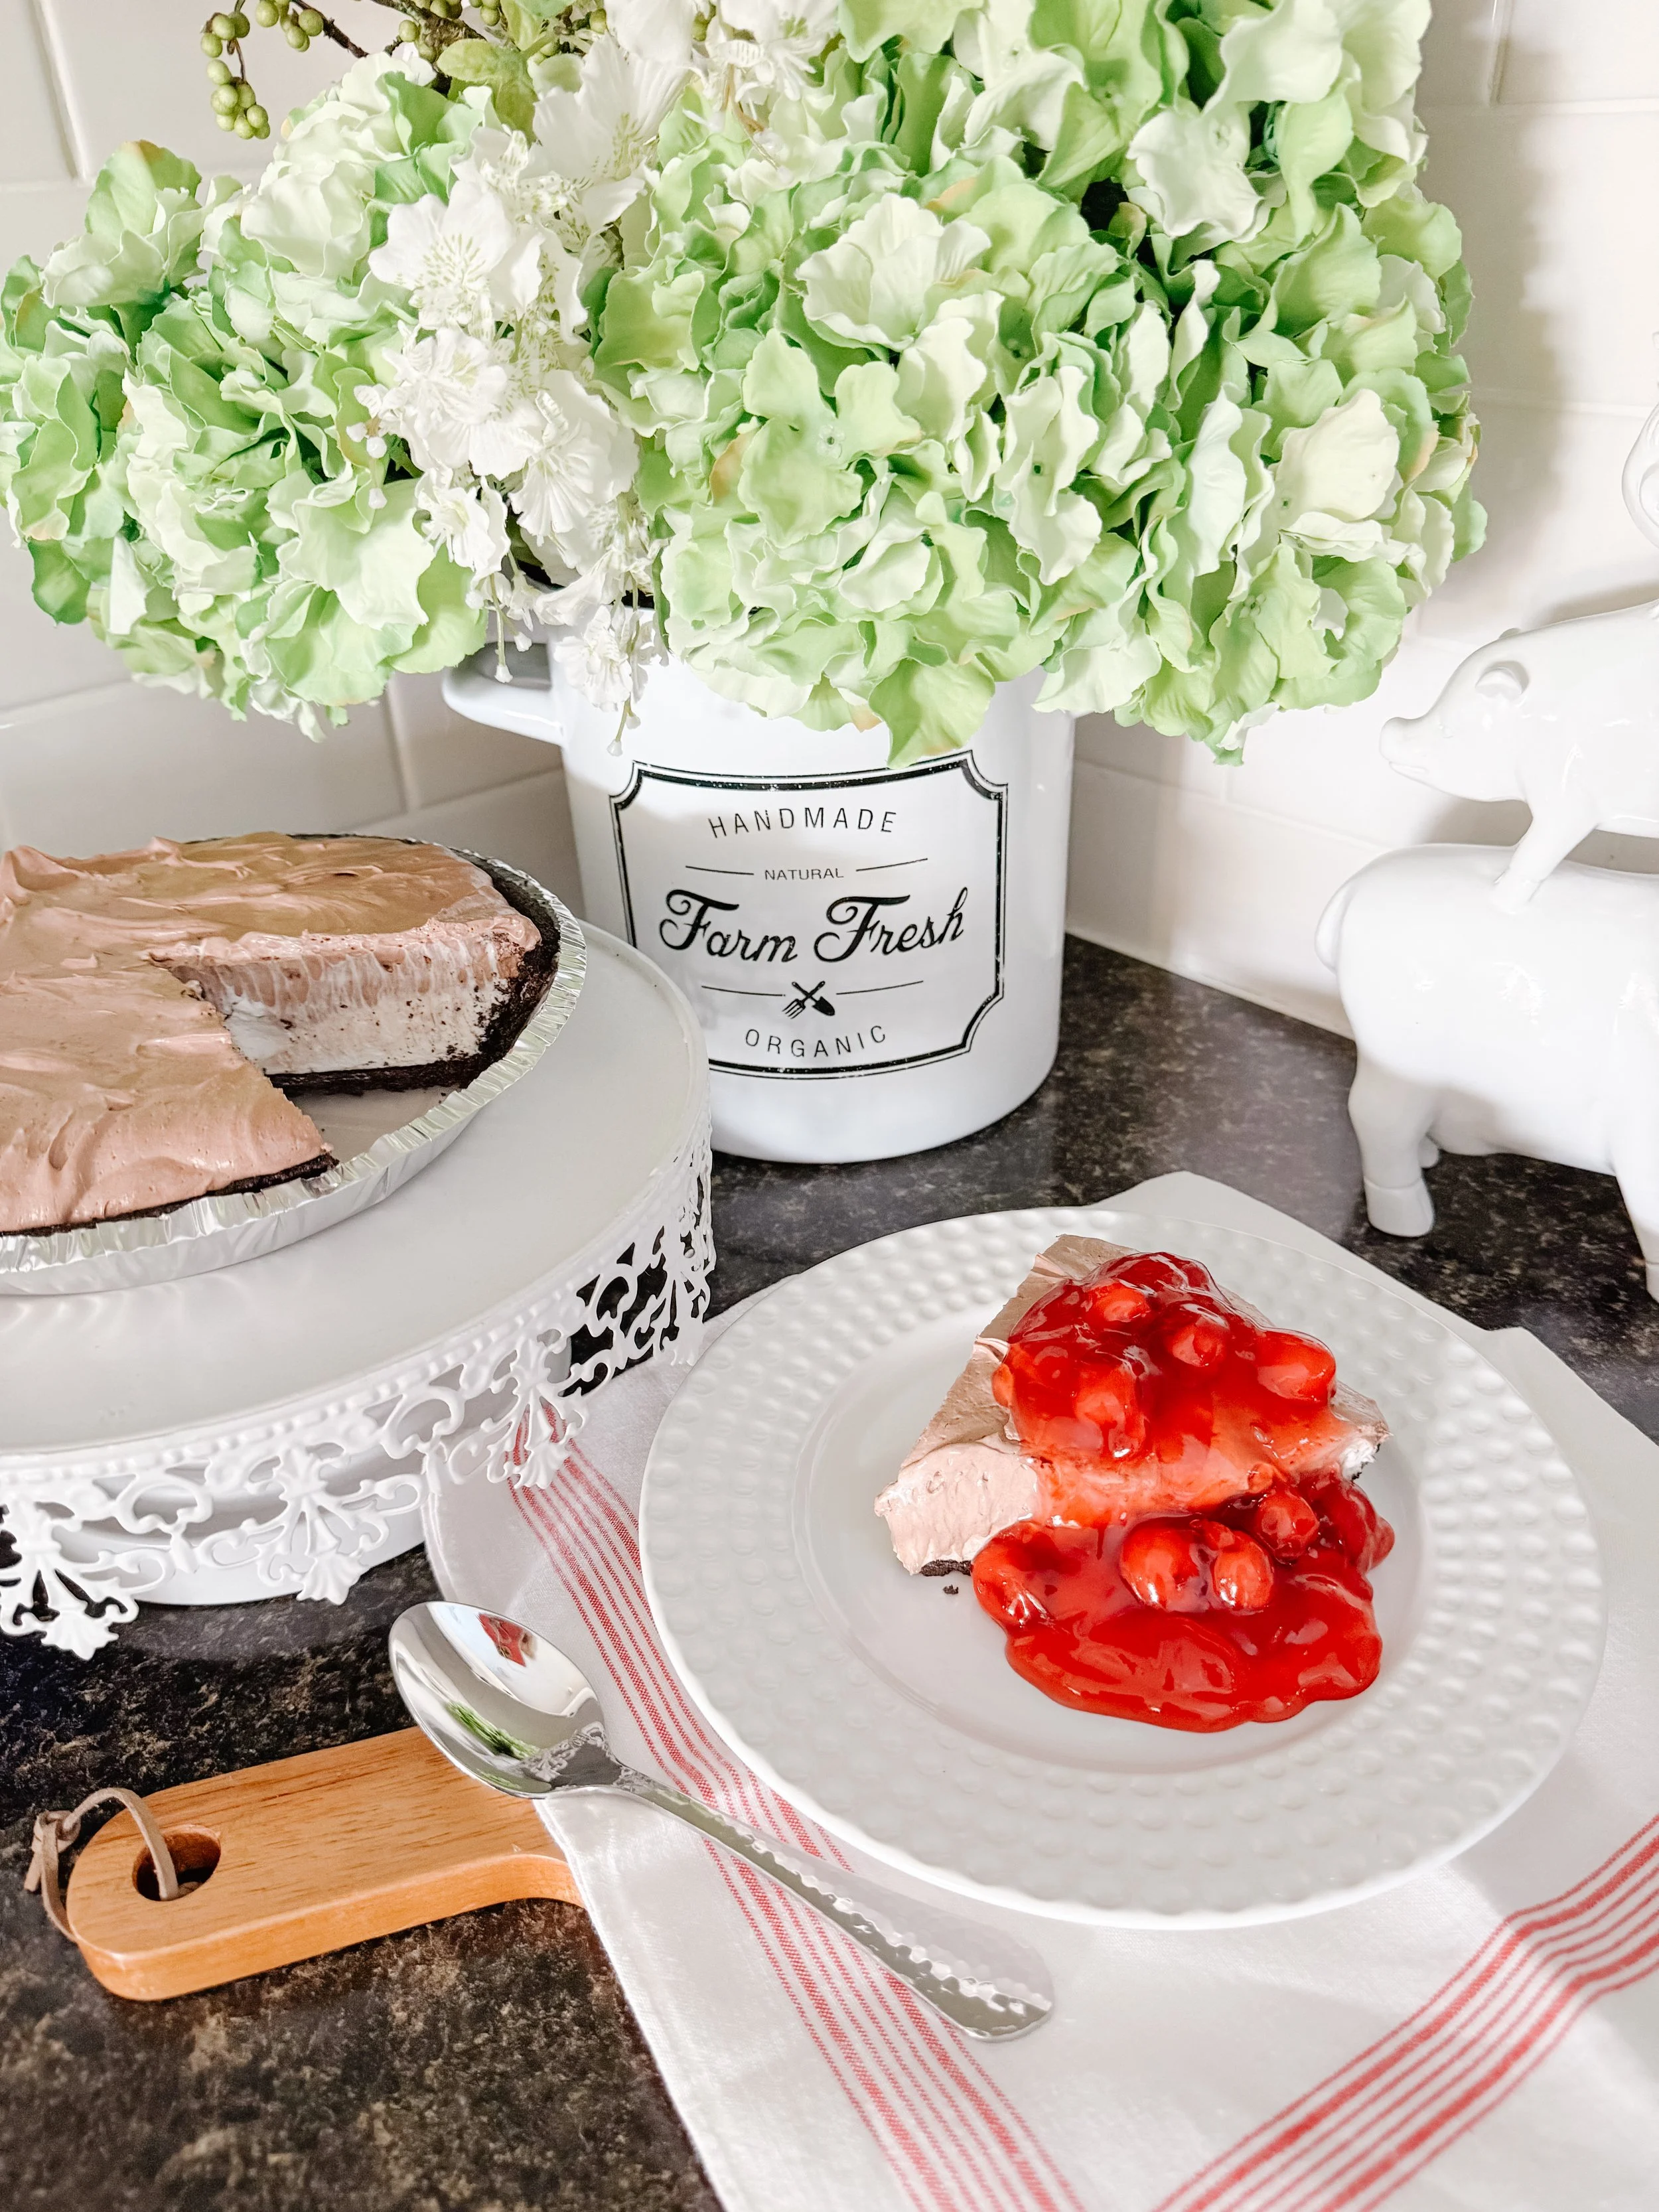
Black Forest Pie
This is a recipe for a treat that is mentioned in DECK THE HALLS WITH HOMICIDE. Your guests will love this delicious dessert.
1 package cream cheese, softened
1/3 cup sugar
2 tsp vanilla
3/4 cup sour cream
2 cups Cool Whip, thawed
1 cup heavy cream, whipped
1/4 cup cocoa powder
2 tbsp sugar
1 tbsp sugar
1 can cherry pie filling
1 pre-made chocolate crumb pie shell
-
Whip the heavy cream and 1 tbsp sugar until stiff peaks form.
Mix the cream cheese in a medium sized bowl, then add sugar, and continue to mix until smooth.
Add vanilla and Cool Whip and mix.
Fold in 3/4 of the whipped cream.
Spoon half the mixture into the pie shell.
Add cocoa and 2 tblsp sugar to the remaining mixture in the bowl, and mix well.
Spread on top of white mixture in pie shell.
Refrigerate 6-8 hours.
When serving, add a generous spoonful of cherry pie filling over the top of each piece.
before turning it upside down onto a plate.
Cool completely.
Note: You can make your own pie shell with
1 1/4 cups chocolate cookie crumbs and 1/4 cup melted butter and pressing into an 8-10 inch pie dish.
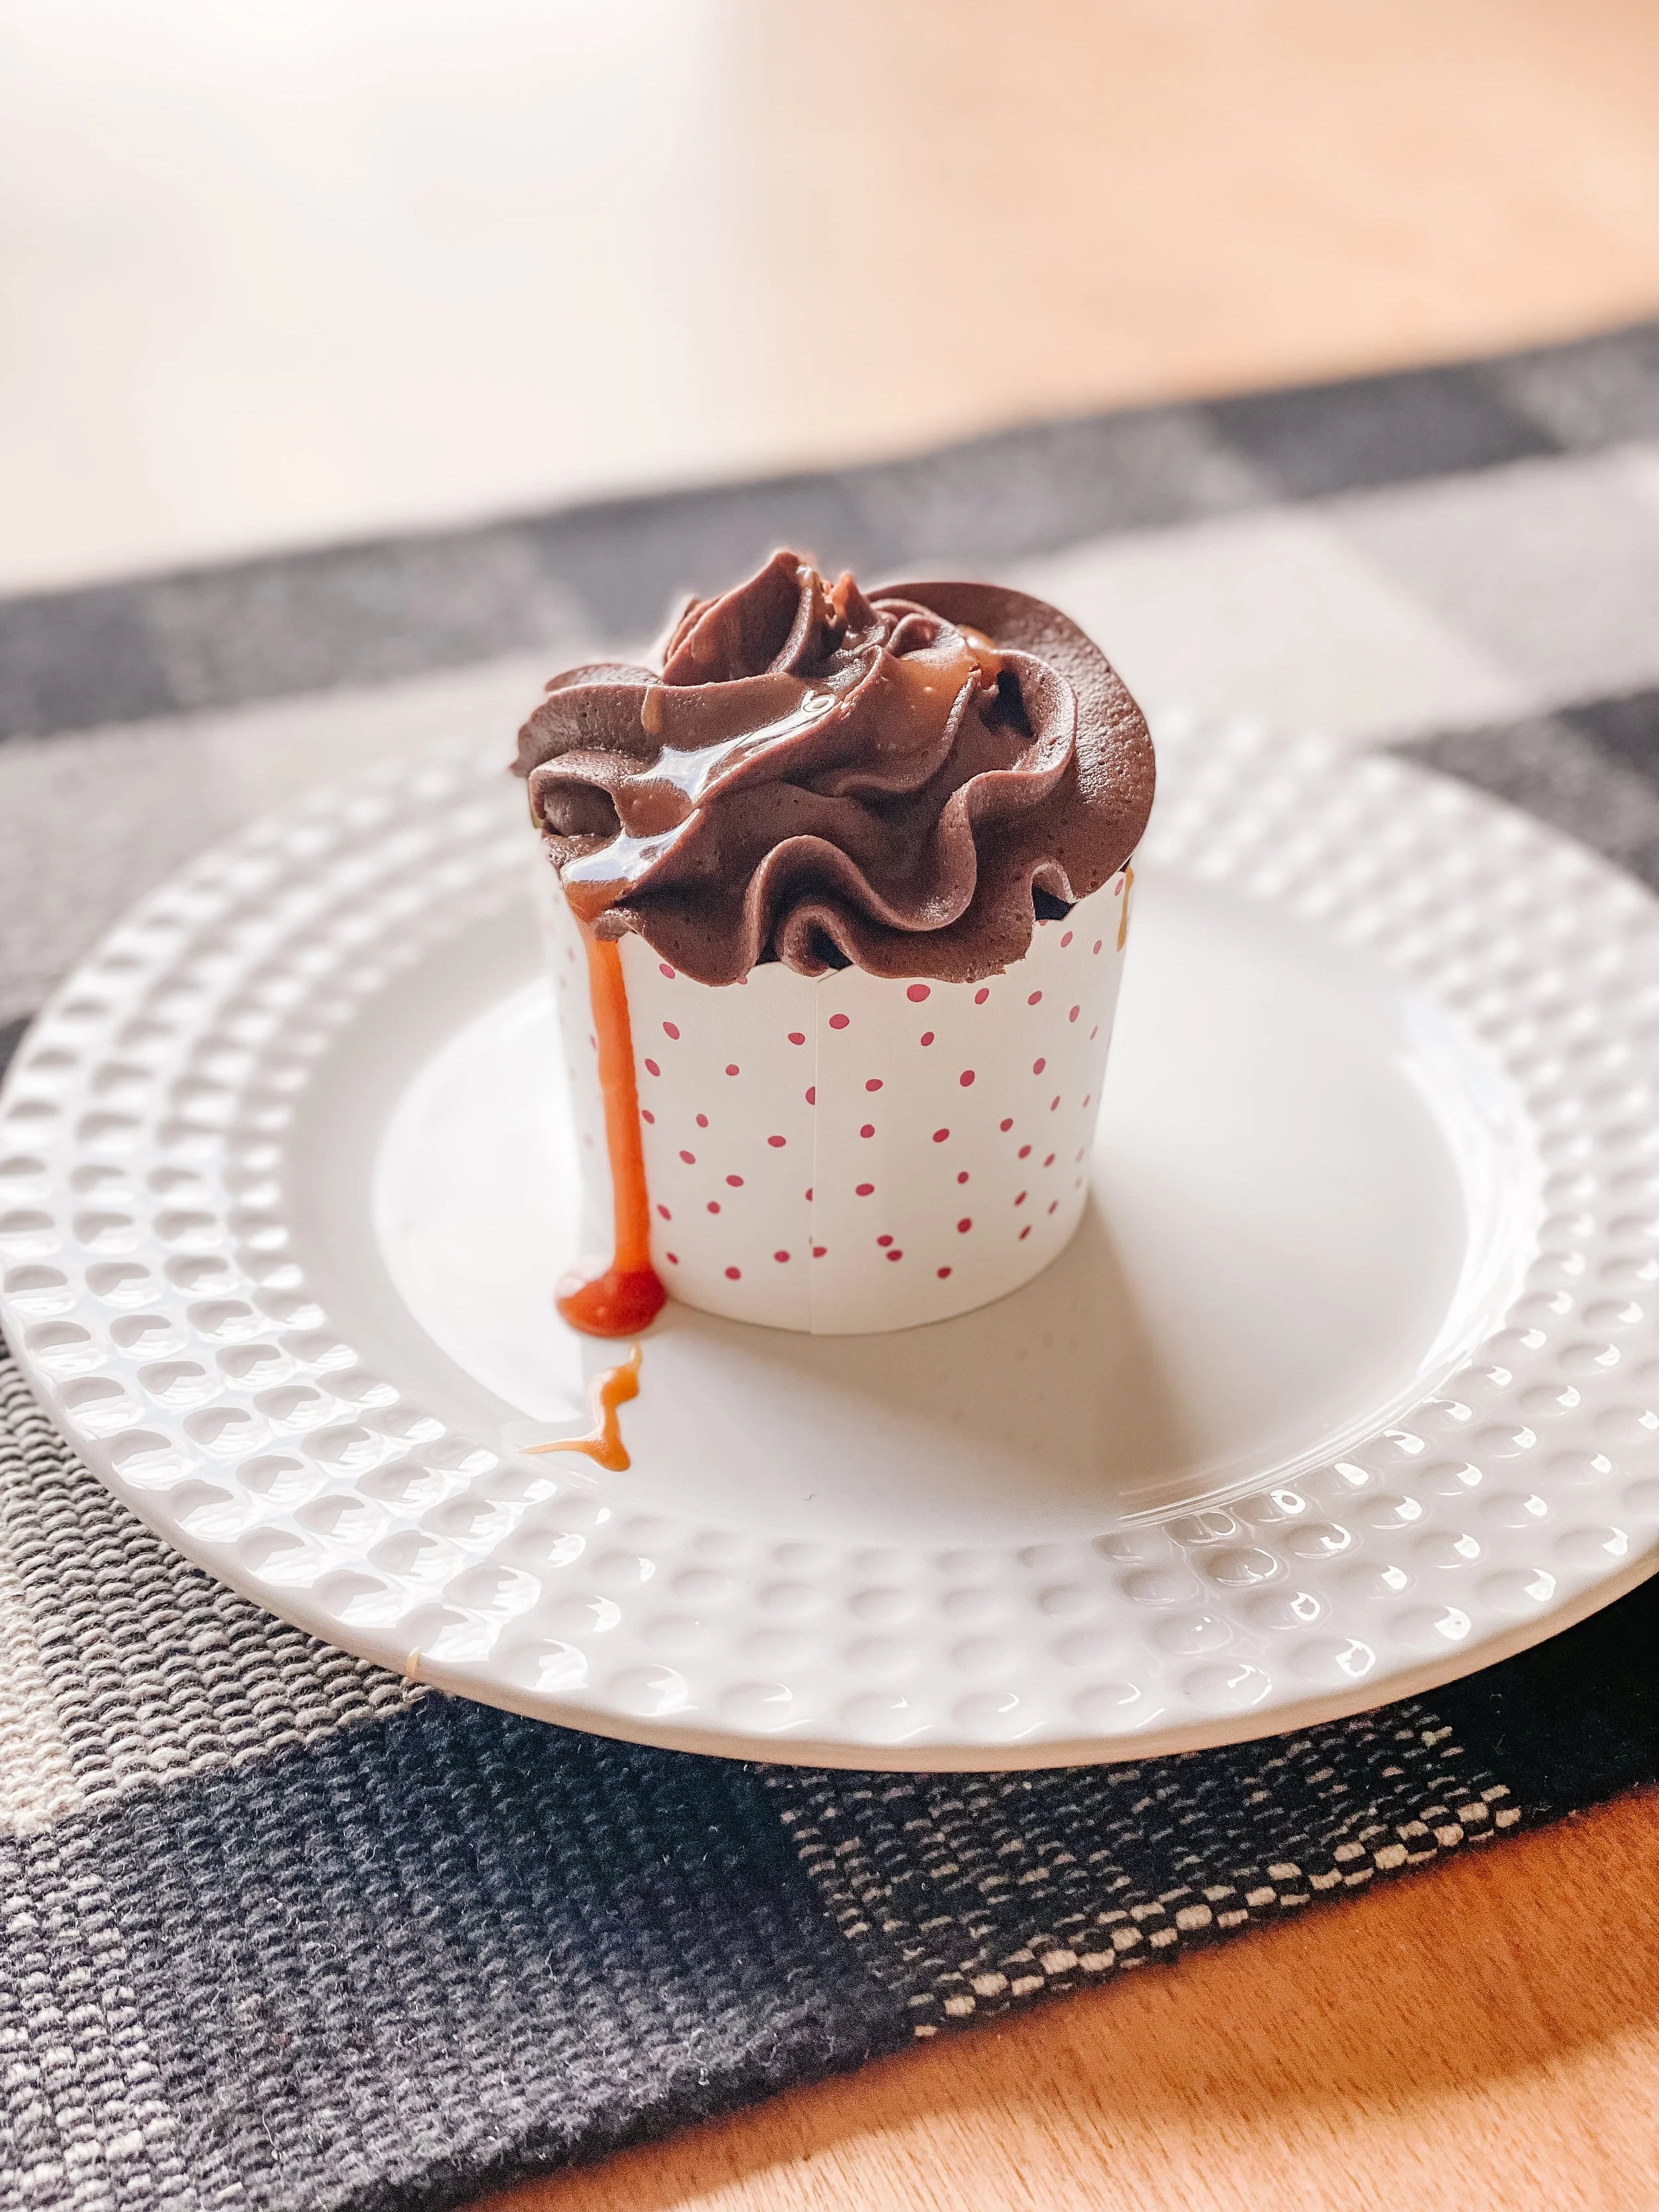
CHRISTMAS CARAMEL CUPCAKE
You’ll find this yummy cupcake mentioned in A CHRISTMAS CANDY KILLING, the first book in the Killer Chocolate Mysteries. This cupcake is the perfect blend of chocolate and caramel and will melt in your mouth. The caramel sauce can be a tiny bit finicky to make, but so worth it. It’s definitely worth an arm wrestle!
Chocolate Cupcakes:
Now, I’ll be honest, I usually use a cake mix. But every once in a while I’ll make them from scratch. So if you’re so inclined, here’s a yummy recipe.
1 cup flour
½ cup unsweetened cocoa powder
½ teaspoon baking soda
½ teaspoon baking powder
1/8 teaspoon salt
½ cup unsalted butter, softened
1 cup sugar
2 large eggs
1 teaspoon vanilla extract
1 cup buttermilk
-
1. Preheat oven to 350˚F. Line a muffin tin with muffin liners.
2. In a medium size bowl sift the flour, cocoa, baking powder, baking soda, and salt.
3. In a separate bowl, with a hand mixer or using a stand mixer (use the paddle attachment), cream together the butter, sugar on high speed for a few minutes, until the mixture is pale and fluffy.
4. Add the eggs, vanilla, and buttermilk and mix again until well blended.
5. Using a spatula, fold the dry ingredients into the wet ingredients until just combined. Don’t over mix.
6. Divide the batter equally between 12 large muffin liners. Bake for 18-20 minutes or until toothpick comes out clean. When done, remove from oven and set aside to cool for 10 minutes then place on wire rack.
Caramel Sauce:
1 cup granulated sugar
6 tablespoons unsalted butter, cut in pieces
½ cup heavy cream (whipping cream in Canada)
½ teaspoon salt
1. Heat sugar in a medium heavy-duty saucepan (try not to use non-stick) over medium heat. Stir constantly using a rubber spatula (heat resistant), or wooden spoon. Clumps will form and eventually melt into a thick, amber-colored liquid. Continue to stir. This may take a while. Be careful not to burn it.
2. When sugar is completely melted, immediately stir in butter until melted and combined. Stir continuously while the butter melts and mixes with the sugar. Caution: the caramel will bubble vigorously when butter is added.
3. Once butter has melted and combined with caramelized sugar, slowly, stir in the heavy cream. Since the cream is colder than the caramel mixture, it will vigorously bubble when added. Continue to stir throughout.
4. When the sauce is the right consistency, remove from heat and stir in the salt. Allow to cool slightly before using. Caramel will thicken as it cools.
Chocolate Buttercream Frosting:
1 ½ cup unsalted butter, softened
5-6 cups powdered icing sugar
1 cup unsweetened cocoa powder
4 tsp vanilla
2-3 tablespoons milk
1. In a large bowl, beat butter until light and fluffy.
2. Add powdered sugar and cocoa and mix again until well combined.
3. Add vanilla and mix.
4. Add milk 1 tablespoon at a time, and beat on high speed until right consistency.
Assemble the Christmas Caramel Cupcakes:
1. Using a knife or a cupcake corer, cut out a small hole in the middle of each cupcake.
2. Fill with 1 – 1 ½ teaspoon of the caramel into the cupcake holes.
3. Top the cupcakes with frosting. I use Wilton’s #1M open star tip.
4. Spoon a teaspoon of caramel over the top of the frosting.
5. Serve.